
In this tutorial, we explain how to configure the Zapier integration for Funnelforms. The integration is configured directly in Zapier, so you will not find the Zapier integration in the left sidebar in the form editor like other integrations.
Step #1 - Connecting Funnelforms to Zapier:
Log in to your Zapier account and create a new Zap. Select the “Funnelforms” app and the “New Entry” trigger event:

Under “Select an account...”, click on “Set up new account”.

A window opens in which you configure the connection to Zapier.

Enter the following data:
License key: You received this in the order confirmation email and can also be found in your WordPress installation under “License & App”.
Domain: Here you enter the domain on which the integration should be configured. (without www. or https://)
API URL: You can find this URL in WordPress under the menu item Integrations -> Zapier. Copy this into the corresponding field. The URL should have the following format:
https://domain.xxx/wp-json/af2/v1
API password: You can set this password yourself in WordPress under the menu item Integrations -> Zapier. Then enter the API password in the corresponding field.

Step #2 - Configuring the connection in Zapier:
You will now be taken to the “Set up trigger” section, where you can select your desired form to be used for this Zap from the “Form ID” drop-down menu.
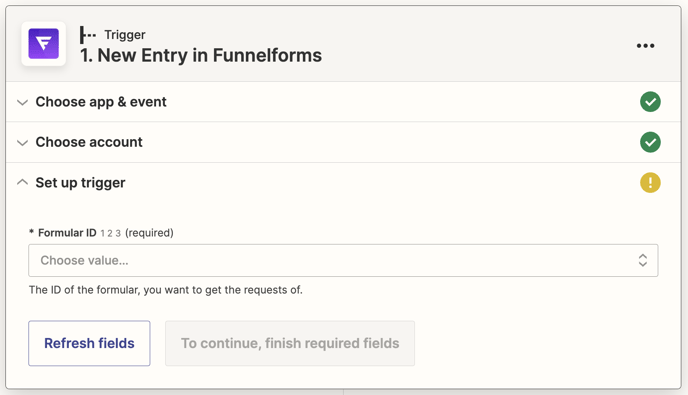
Click on “Continue” after selecting the form.
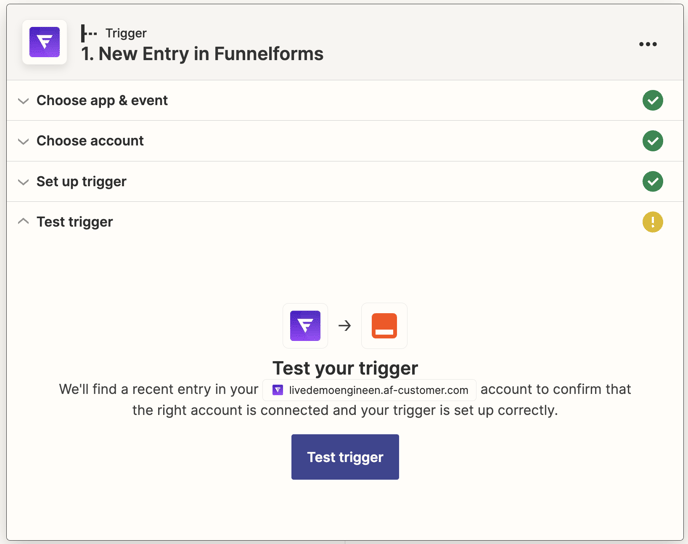
Step #3 - Test the connection:
Click on the "Test trigger" button to load the form entries. Please make sure that you have already sent the form completely at this point so that you can use the data for further configuration of the Zap.
The previous entries in the form are now displayed.
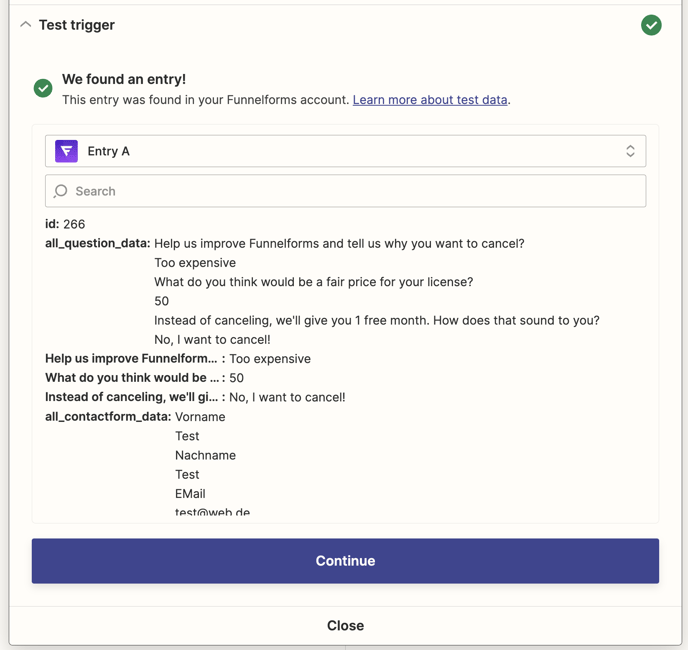
You can now add further modules and use the data to build your desired automations.

Note: Depending on which Zapier plan you have, an “Update Time” of 1, 2 or 15 minutes defined by Zapier is associated with the respective plan. This “Update Time” determines the interval at which Zapier checks the created Zaps for newly transmitted data (complete leads).